Build Guide
How Custom Carpentry Is Actually Made — Workshop to Install, Step by Step
Your flat looks untouched for weeks and it feels like nothing is happening. Here is what is actually going on, and why almost all of it happens somewhere else.
20 August 2026 · 8 min read · Updated 20 August 2026
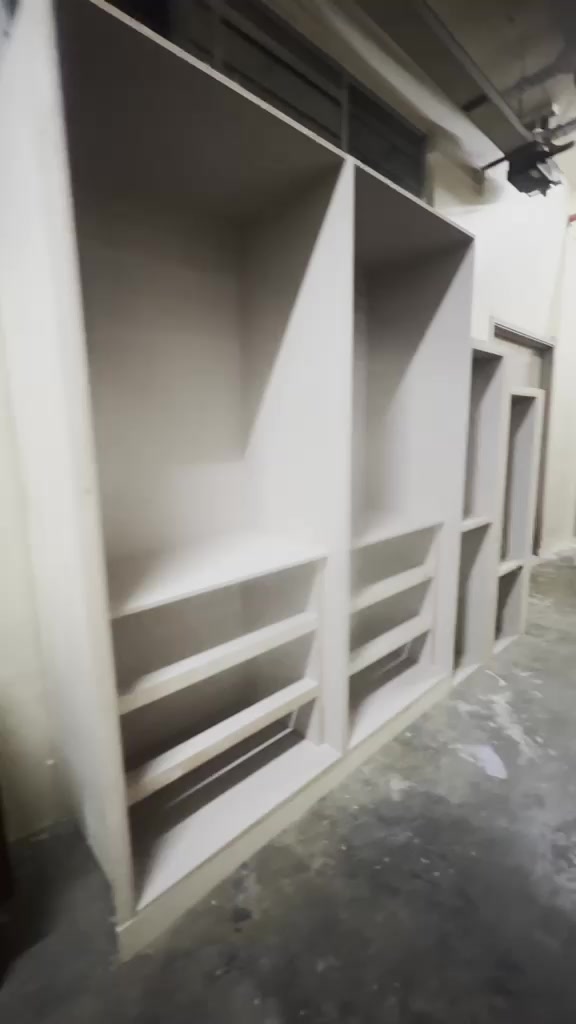
Finished wardrobe carcasses standing in a Singapore carpentry workshop, squared and staged for delivery
The same sequence in 32 seconds — carcass build, runners, pull-out baskets, then the finished kitchen
The most common question we get mid-project is some version of: "Is anything actually happening?"
The flat looks exactly as it did three weeks ago. No one has been there. It feels like the job has stalled.
It has not. Almost all carpentry happens somewhere else.
Watch it happen
The clip above is a Bidadari BTO build compressed into 32 seconds — the workshop stages first, then the install, then the finished kitchen. Everything below is that sequence explained.
Stage 1 — Site measurement
Not the floor plan. The actual space.
HDB and condo walls are not square, floors are not level, and ceilings drop where the developer routed services. A carpenter records wall heights at multiple points, corner angles, beam positions, and the exact location of every socket, tap, waste pipe and gas point.
Timing matters more than people expect. This measure should happen after tiling and flooring are done. Tiles and flooring change levels by anywhere from a few millimetres to over 20mm. Cutting panels from pre-tiling dimensions is one of the most common causes of gaps at handover. See the BTO carpentry timeline for where this sits in the wider sequence.
Stage 2 — Design and specification
Layout, internal configuration, materials, hardware. Everything gets locked here, because the next stage converts it into cuts and a cut panel cannot be un-cut.
That includes laminate and edging codes, runner and hinge models, door profiles, and internal divisions. This is the point to change your mind about drawer counts or shelf heights — not later.
Stage 3 — Cutting list and panel cutting
The design becomes a list of every single panel with exact dimensions, then sheets get cut down on a panel saw. The list is optimised to get the most out of each sheet, because offcuts are pure waste.
This is why late changes are expensive. Once sheets are cut to a revised list, the original panels are scrap.
Stage 4 — Edge banding and finishing
Every exposed cut edge is banded and sealed.
This is the stage that decides whether the carpentry survives Singapore. A laminated panel's face is sealed; its cut edges are raw. Leave an edge unsealed and humidity gets into the core — in a kitchen, yard or bathroom, that means swelling that never reverses.
It is also invisible in a finished photograph, which is exactly why it is the corner most often cut. Ask any carpenter how they treat edges in wet areas.
Stage 5 — Carcass assembly
Panels become boxes, squared on a flat workshop floor.
Squaring here rather than in your flat matters: your screed is not level, and a carcass assembled on an uneven surface locks a twist into the box that no amount of on-site packing fully removes. Assemble flat, then pack level on site — never the reverse.
Stage 6 — Hardware fitting, in the workshop
Runners, hinges, locks, pull-outs — fitted and adjusted before anything leaves.
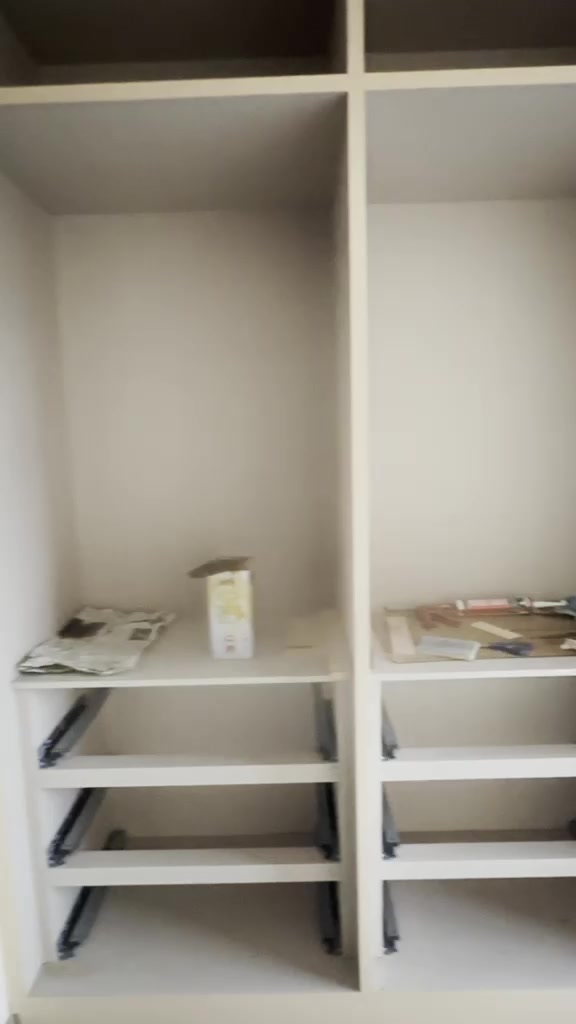
In the video you can see runners going into wardrobe bays while the carcasses are still on the workshop floor. Every drawer gets run, tested and adjusted there. By the time the unit reaches the flat, the drawers already work.
The alternative — fitting hardware on site — means doing precision adjustment in a dusty room with hand tools and a customer watching. It is slower and the result is worse. See the hardware guide for what should be specified.
Stage 7 — Delivery
Planned around access, not convenience. Lift internal dimensions, corridor turns, stairwell width and door openings set a hard ceiling on how large any single piece can be.
This is why a "seamless" full-height wardrobe wall is not one object — it is several carcasses sized to fit the lift, joined on site so the joins do not read.
Stage 8 — Installation and levelling
Units positioned, packed level against the uneven floor, scribed to the walls where the piece is built in, then permanently fixed. Filler and end panels close whatever gap is left.
This is the whole extra cost of built-in versus freestanding — see freestanding vs built-in. A freestanding piece skips scribing and fixing entirely, which is why it installs in a fraction of the time.
Stage 9 — Doors, worktop, final adjustment
Doors and drawer fronts hung, then every hinge adjusted so the gaps between doors are even across the whole run.
Consistent gaps are the single clearest visual marker of good carpentry. Uneven reveals are what make a run look wrong even when someone cannot say why.
Worktops go on at this stage where applicable — quartz and sintered stone are templated after carcasses are set, then fabricated and returned, which is why a kitchen usually needs two site visits.
Stage 10 — Handover and snagging
You inspect, you list what is wrong. Minor alignment gets fixed on the spot. Anything needing a remade component goes back to the workshop.
Snag properly: open every door and drawer, check gaps along each run, run your hand along every edge, and look underneath and behind. A short list at handover is normal. A carpenter who resists a snag list is the warning sign.
So how long does it take?
Three to six weeks from confirmed design to completed install, for most flats.
The important part: the disruptive on-site portion is usually a few days. Freestanding pieces often install in one. A full built-in kitchen and wardrobe package runs two to five days on site, sometimes split across two visits for worktop templating.
The weeks where nothing appears to happen are the weeks your carpentry is being built.
Want to see it for yourself?
Our Eunos workshop is open Monday to Saturday and you are welcome to come and see work in progress — including, if the timing lines up, your own.
That is also a fair test of any carpenter you are considering: a workshop you can visit means fabrication is genuinely in-house.
WhatsApp Alan to arrange a visit.

Written by
Alan Chew
Founder & Master Carpenter · TOKTOKTOK
Alan founded TOKTOKTOK Carpentry Singapore in 2020 and has personally led 200+ HDB, condo, and landed carpentry builds across the island — handling every project from first measurement to final handover. More about Alan →
Ready to build?
Get a real quote for your project.
Share your floor plan and a few reference photos. Real quote in writing within 24 hours, no commitment.